7 Git: Collaboration and Conflict Management
7.1 Learning Objectives
In this lesson, you will learn:
- How to use Git and GitHub to collaborate with colleagues on code
- What typically causes conflicts when collaborating
- Workflows to avoid conflicts
- How to resolve a conflict
7.2 Collaborating with Git
Git is a great tool for working on your own, but even better for working with friends and colleagues. Git allows you to work with confidence on your own local copy of files with the confidence that you will be able to successfully synchronize your changes with the changes made by others.
The simplest way to collaborate with Git is to use a shared repository on a hosting service such as GitHub, and use this shared repository as the mechanism to move changes from one collaborator to another. While there are other more advanced ways to sync git repositories, this “hub and spoke” model works really well due to its simplicity.
7.2.1 Activity: Collaborating with a trusted colleague
Settings. Working in pairs, choose one person as the ‘Owner’ and one as the ‘Collaborator’.
Then, have the Owner visit their training-repo repository created earlier,,
and visit the Settings page, and select the Collaborators screen, and add
the username of your Collaborator in the box.
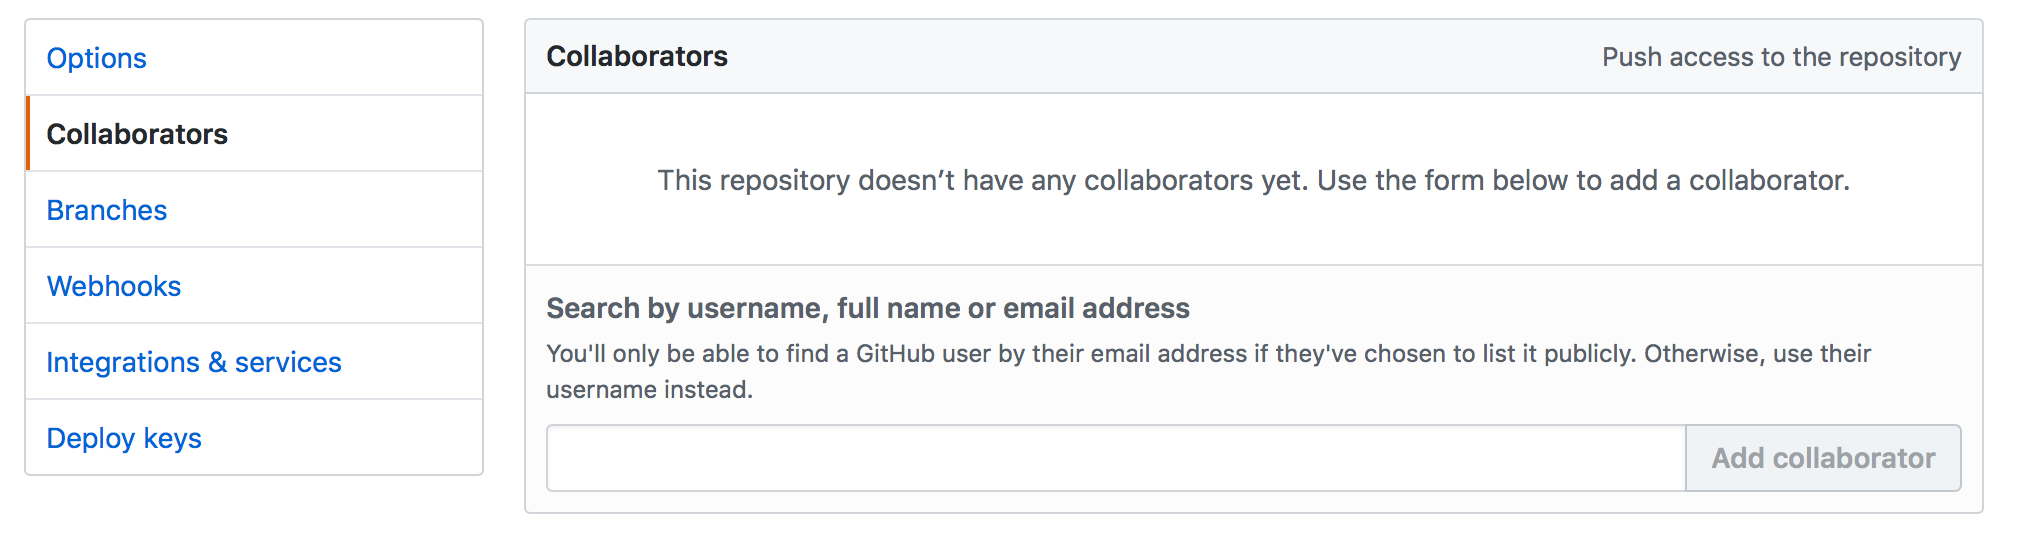
Once the collaborator has been added, they should check their email for an invitation from GitHub, and click on the acceptance link, which will enable them to collaborate on the repository.
Collaborator clone. To be able to contribute to a repository, the collaborator must clone the repository from the Owner’s GitHub account. To do this, the Collaborator should visit the GitHub page for the Owner’s repository, and then copy the clone URL. In R Studio, the Collaborator will create a new project from version control by pasting this clone URL into the appropriate dialog (see the earlier chapter introducing GitHub).
Collaborator Edits. With a clone copied locally, the Collaborator can now make changes to the
index.Rmd file in the repository, adding a line or statement somewhere noticeable
near the top. Save your changes.
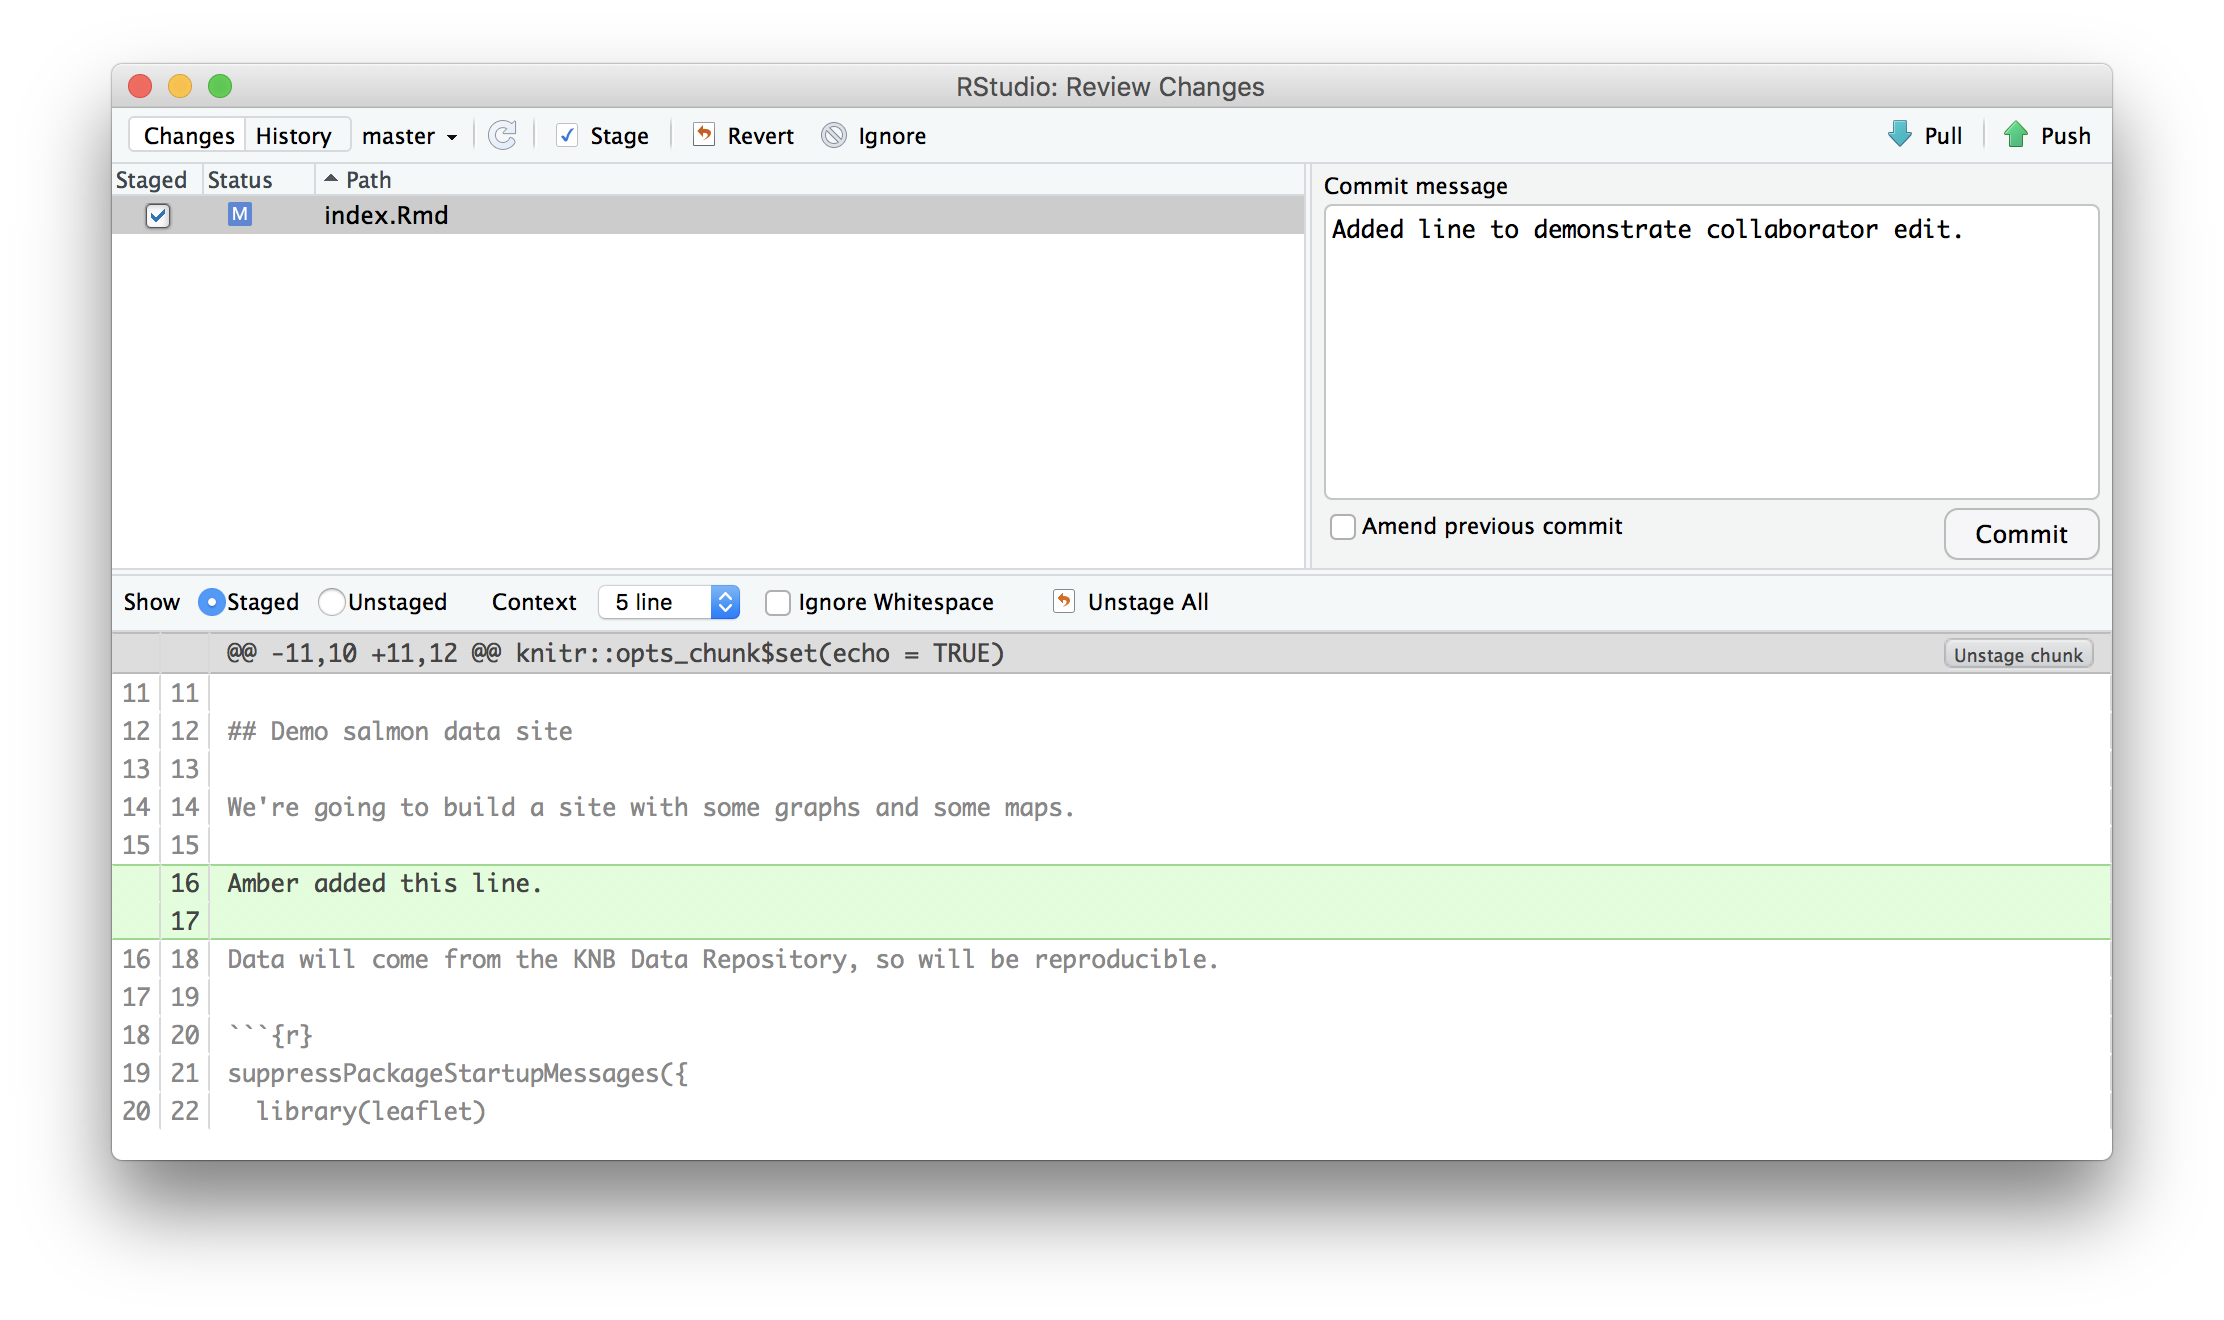
Collaborator commit and push. To sync changes, the collaborator will need to add, commit, and
push their changes to the Owner’s repository. But before doing so, its good practice
to pull immediately before committing to ensure you have the most recent changes
from the owner. So, in R Studio’s Git tab, first click the “Diff” button to
open the git window, and then press the green “Pull” down arrow button. This will
fetch any recent changes from the origin repository and merge them. Next, add
the changed index.Rmd file to be committed by cocking the check box next to it,
type in a commit message, and click ‘Commit.’ Once that finishes, then the collaborator can
immediately click ‘Push’ to send the commits to the Owner’s GitHub repository.
Owner pull. Now, the owner can open their local working copy of the code
in RStudio, and pull those changes down to their local copy.
Congrats, the owner now has your changes!
Owner edits, commit, and push. Next, the owner should do the same. Make changes to
a file in the repository, save it, pull to make sure no new changes have been made
while editing, and then add, commit, and push the Owner changes to GitHub.
Collaborator pull. The collaborator can now pull down those owner changes,
and all copies are once again fully synced. And you’re off to collaborating.
7.3 Merge conflicts
A merge conflict occurs when both the owner and collaborator change the same lines in the same file without first pulling the changes that the other has made. This is most easily avoided by good communication about who is working on various sections of each file, and trying to avoid overlaps. But sometimes it happens, and git is there to warn you about potential problems. And git will not allow you to overwrite one person’s changes to a file with another’s changes to the same file if they were based on the same version.
The main problem with merge conflicts is that, when the Owner and Collaborator both make changes to the same line of a file, git doesn’t know whose changes take precedence. You have to tell git whose changes to use for that line.
7.4 How to resolve a conflict
7.4.1 Abort, abort, abort…
Sometimes you just made a mistake. When you get a merge conflict, the repository is placed in a ‘Merging’ state until you resolve it. There’s a command line command to abort doing the merge altogether:
git merge --abortOf course, after doing that you still haven’t synced with your collaborator’s changes, so things are still unresolved. But at least your repository is now usable on your local machine.
7.4.2 Checkout
The simplest way to resolve a conflict, given that you know whose version of the
file you want to keep, is to use the command line git program to tell git to
use either your changes (the person doing the merge), or their changes (the other collaborator).
- keep your collaborators file:
git checkout --theirs conflicted_file.Rmd - keep your own file:
git checkout --ours conflicted_file.Rmd
Once you have run that command, then run add, commit, and push the changes as normal.
7.4.3 Pull and edit the file
But that requires the command line. If you want to resolve from RStudio, or if
you want to pick and choose some of your changes and some of your collaborator’s,
then instead you can manually edit and fix the file. When you pulled the file
with a conflict, git notices that there is a conflict and modifies the file to show
both your own changes and your collaborator’s changes in the file. It also shows the
file in the Git tab with an orange U icon, which indicates that the file is Unmerged,
and therefore awaiting you help to resolve the conflict. It delimits
these blocks with a series of less than and greater than signs, so they are easy to find:
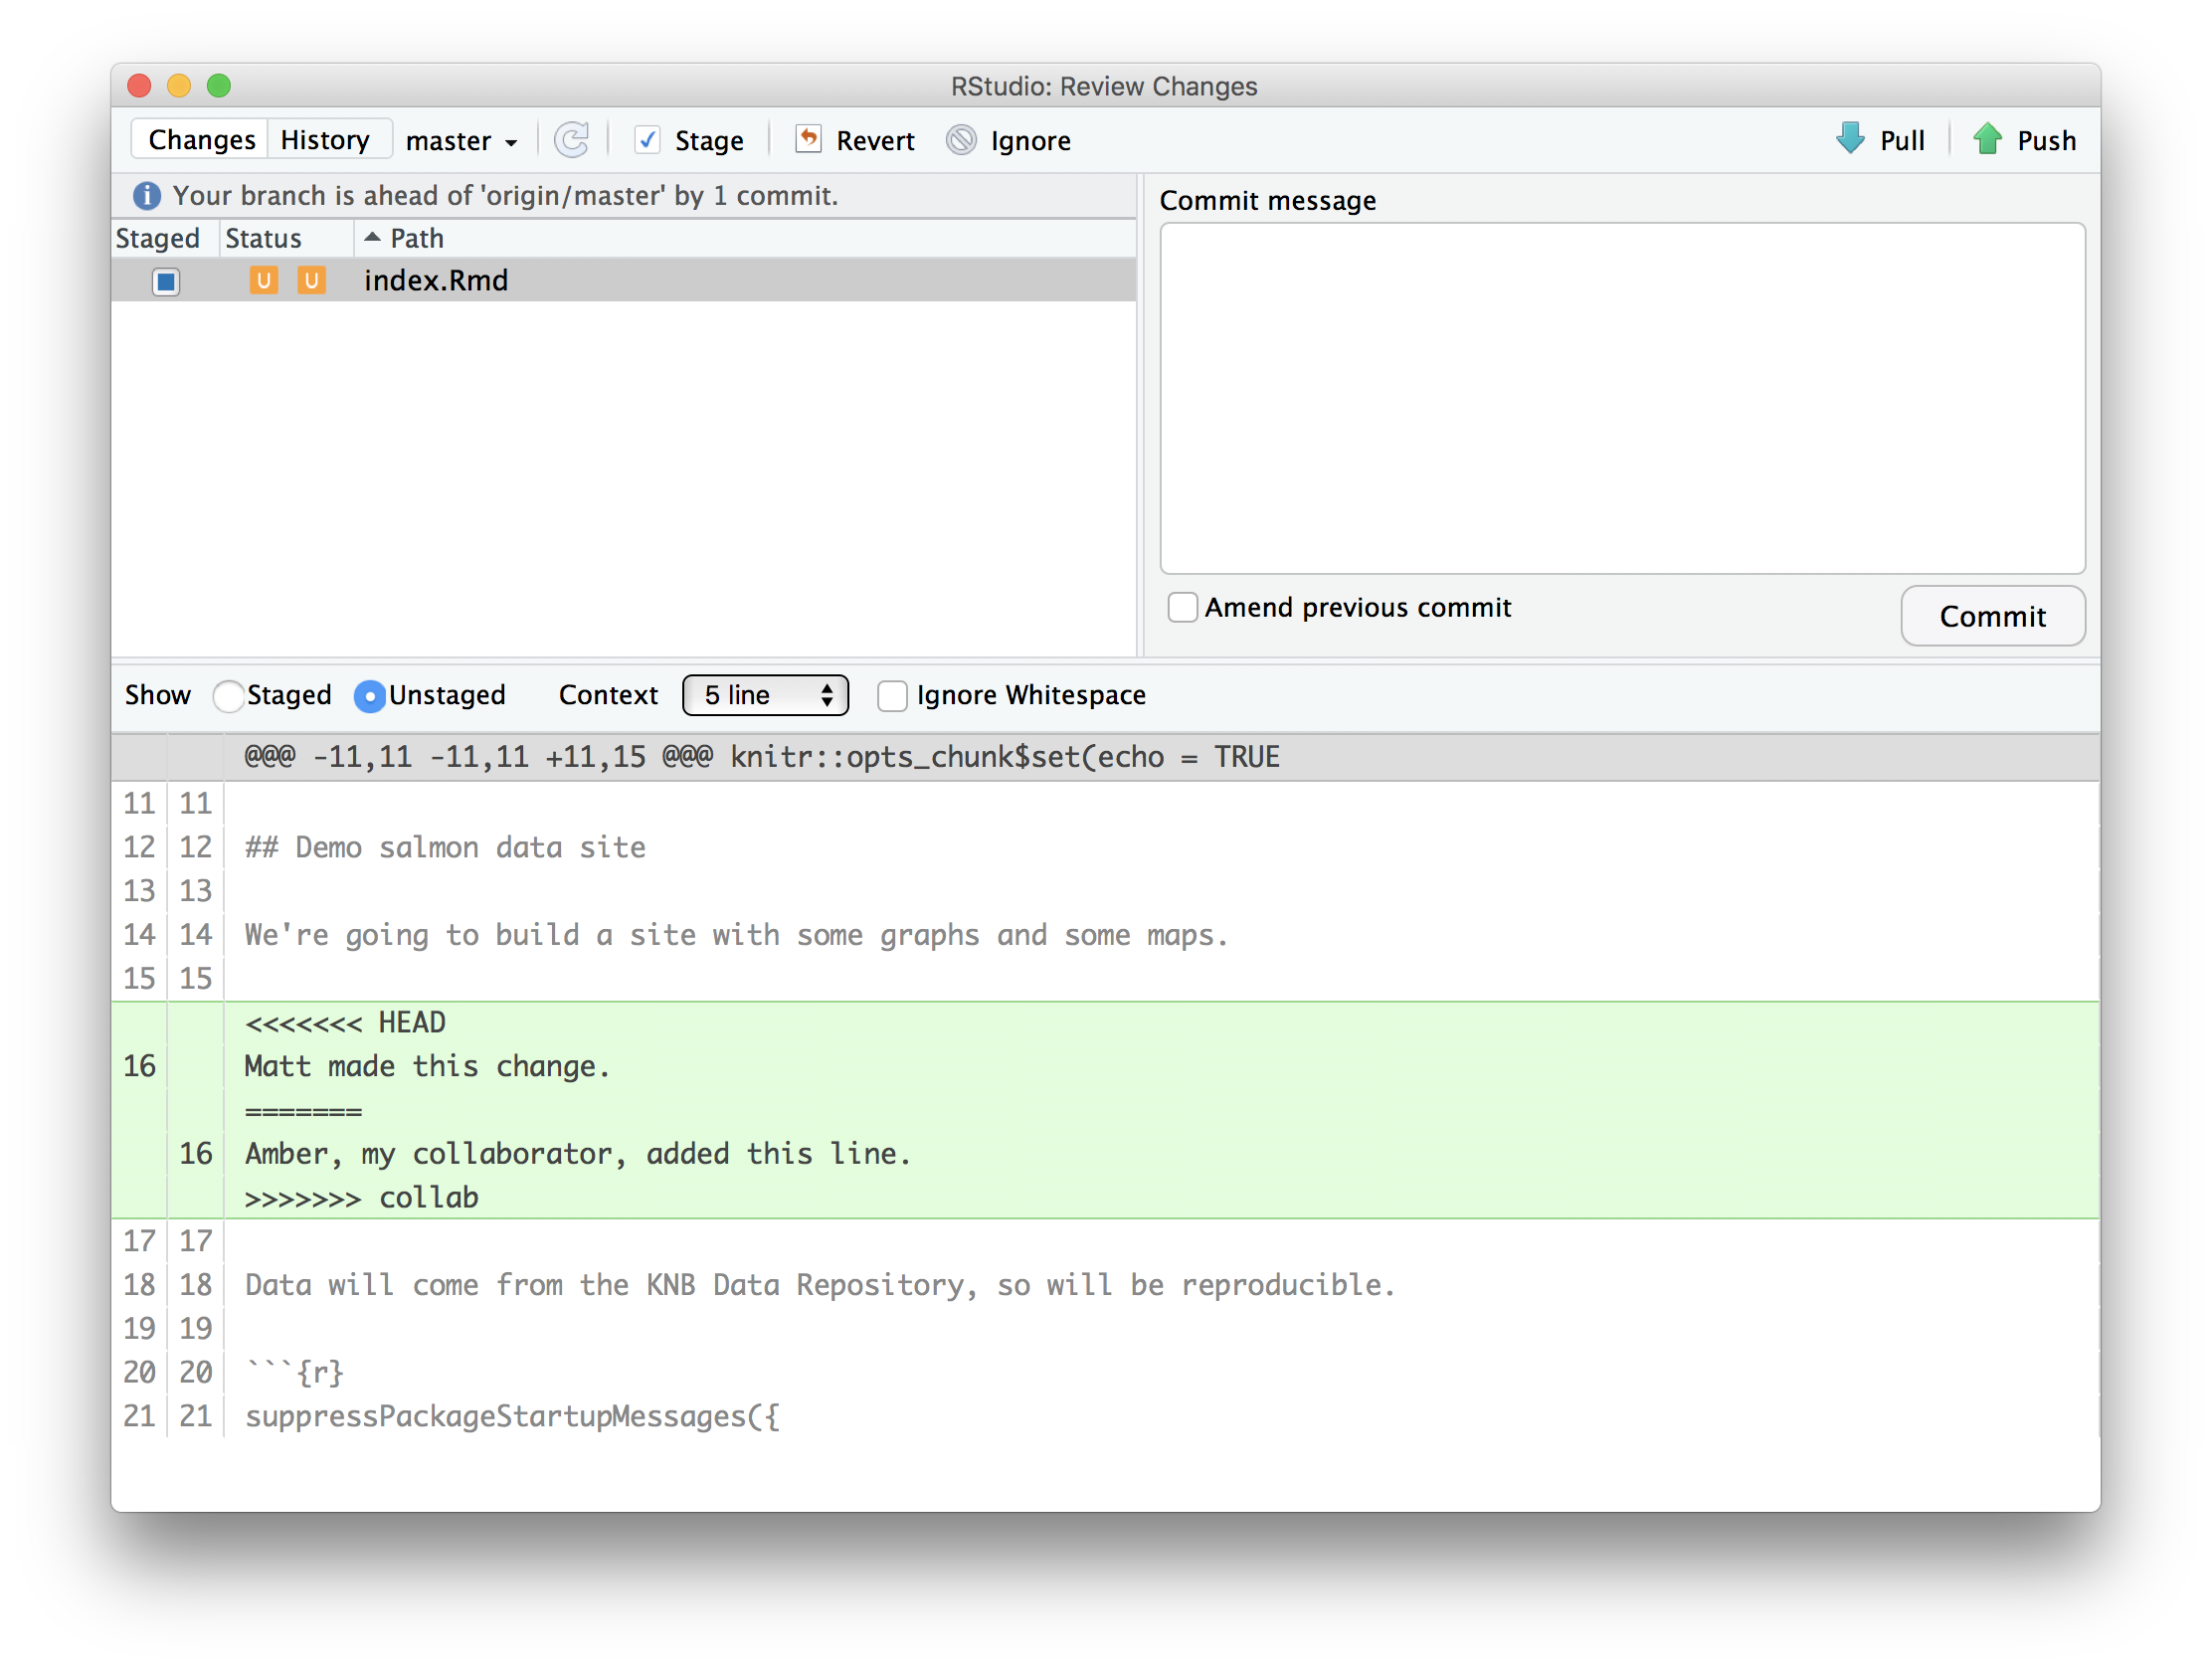
To resolve the conflicts, simply find all of these blocks, and edit them so that
the file looks how you want (either pick your lines, your collaborators lines,
some combination, or something altogether new), and save. Be sure you removed the
delimiter lines that started with <<<<<<<, =======, and >>>>>>>.
Once you have made those changes, you simply add, commit, and push the files to resolve the conflict.
7.5 Workflows to avoid merge conflicts
Communicate often. Tell each other what you are working on.
Pull -> Edit -> Add -> Pull -> Commit -> Push
Pull before every commit, and commit often in small chunks.
7.6 Other Collaborative Workflows with GitHub
In our exercise we experience a workflow that is suitable for a small team working together on a project. However if the frequency of the merge conflicts increase, it is the sign that you might want o use another type of workflow involving branches and pull requests. Branches in git enable you to create a separate and siloed version of the content of your repository. You can work on this branch / copy without disrupting the work of others. When you are done, you can ask to merge back your branches to the original version via a pull request.
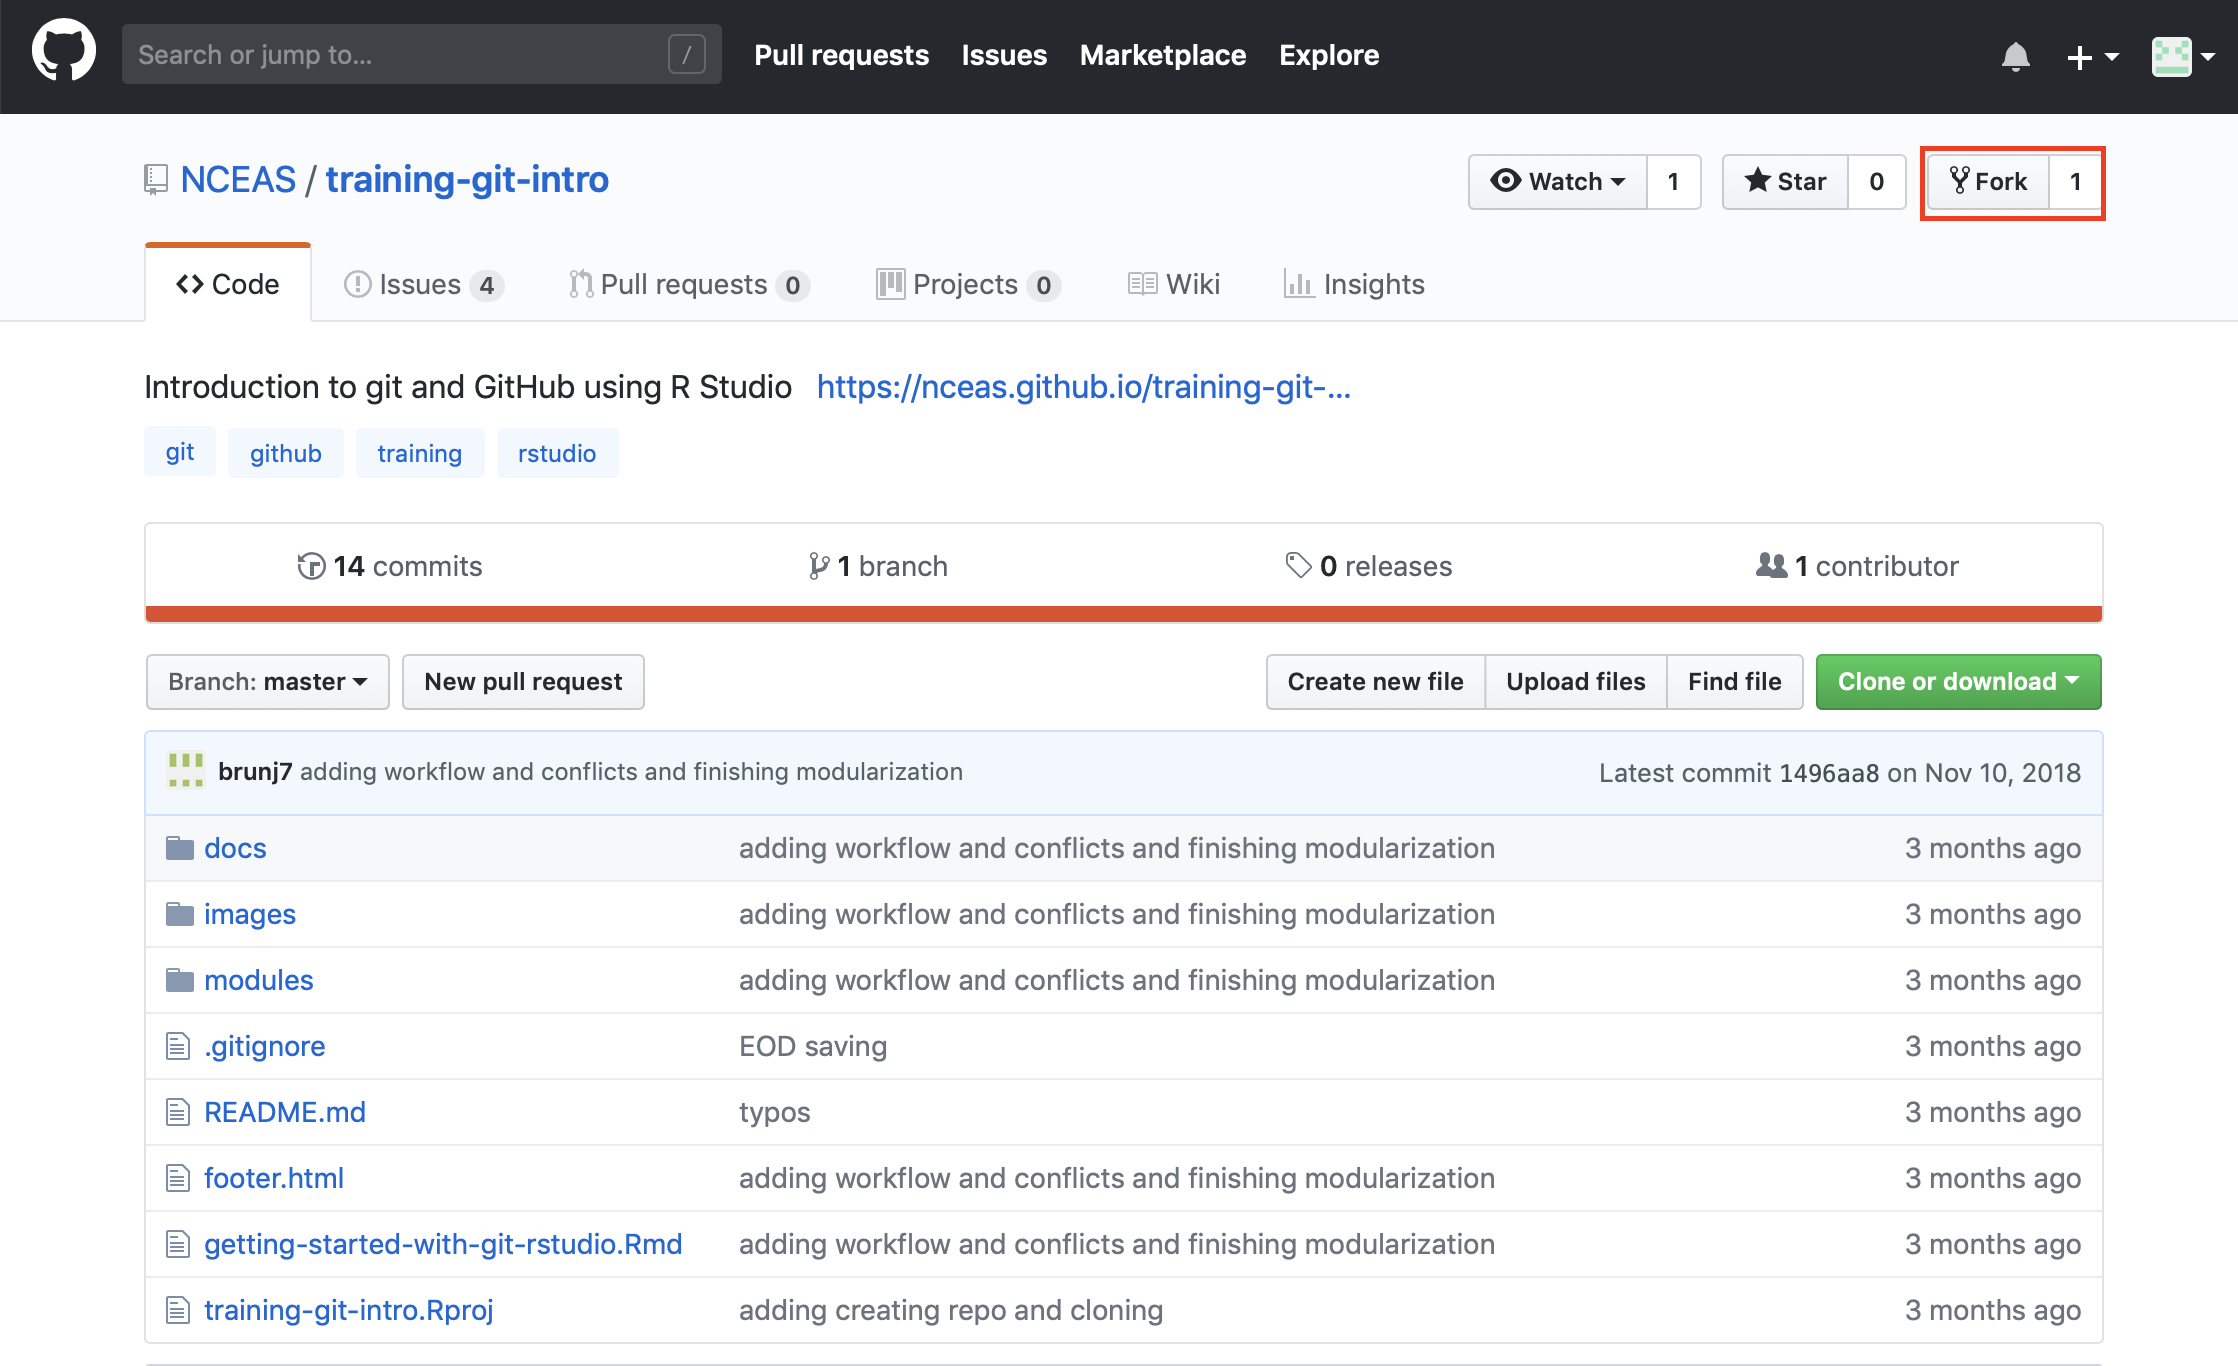
Sometimes, you want external people to the project to be able to contribute. However if you would like to control more what they are contributing, you can use this type of workflow where you will have to review and accept every changes that are submitted by this external collaborator. A fork is a copy of a repository that will be stored under your user account. Forking a repository allows you to freely experiment with changes without affecting the original project. We can create a fork on GitHub by clicking the “fork” button in the top right corner of our repository webpage.
7.6.1 Collaborating through Forking, aka the GitHub workflow
Most commonly, forks are used to either propose changes to someone else’s project or to use someone else’s project as a starting point for your own idea.
When you are satisfied with your work, you can initiate a Pull Request to initiate discussion about your modifications and requesting to integrate your changes to the main repository. Your commit history allows the original repository administrators to see exactly what changes would be merged if they accept your request. Do this by going to the original repository and clicking the “New pull request” button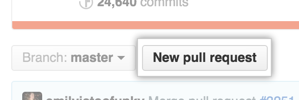
Next, click “compare across forks”, and use the dropdown menus to select your fork as the “head fork” and the original repository as the “base fork”.
Then type a title and description for the changes you would like to make. By using GitHub’s @mention syntax in your Pull Request message, you can ask for feedback from specific people or teams.
This workflow is recommended when you do not have push/write access to a repository, such as contributing to a open source software or R package, or if you are heavily changing a project.
7.6.2 Collaborating through write / push access
When you collaborate closely and actively with colleagues, you do not want necessarily to have to review all their changes through pull requests. You can then give them write access (git push) to your repository to allow them to directly edit and contribute to its content. This is the workflow we will recommend to use within your working group.
You still add collaborators with write access to the repository, like we did previously. The new part of the workflow is the use of branches
7.6.2.1 Branches
adapted from https://www.atlassian.com/git/tutorials/git-merge
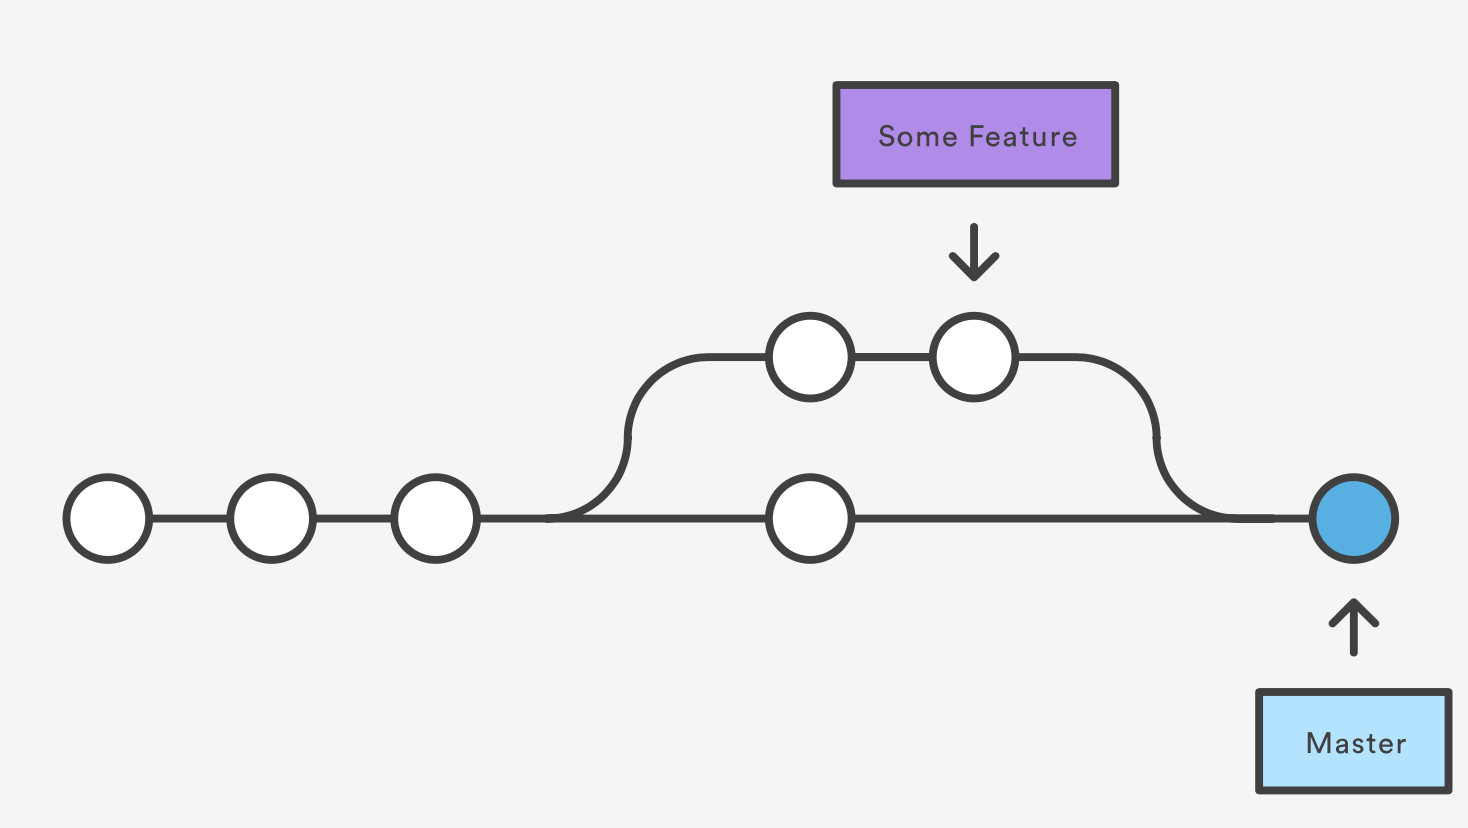
What are branches? Well in fact nothing new, as the master is a branch. A branch represents an independent line of development, parallel to the master (branch).
Why should you use branches? For 2 main reasons:
- We want the master to only keep a version of the code that is working
- We want to version the code we are developing to add/test new features (for now we mostly talk about feature branch) in our script without altering the version on the master.
7.7 Working with branches
7.7.1 Creating a new branch
In RStudio, you can create a branch using the git tab.
- Click on the branch button

- Fill the branch name in the new branch window; in this example, we are going to use
testfor the name; leave the other options as default and click create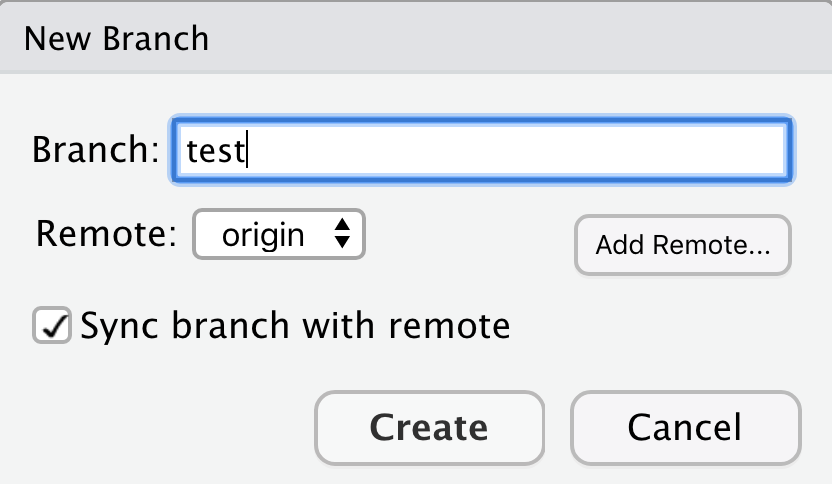
- you will be directly creating a local and remote branch and switch to it

Congratulations you just created your first branch!
Let us check on GitHub:
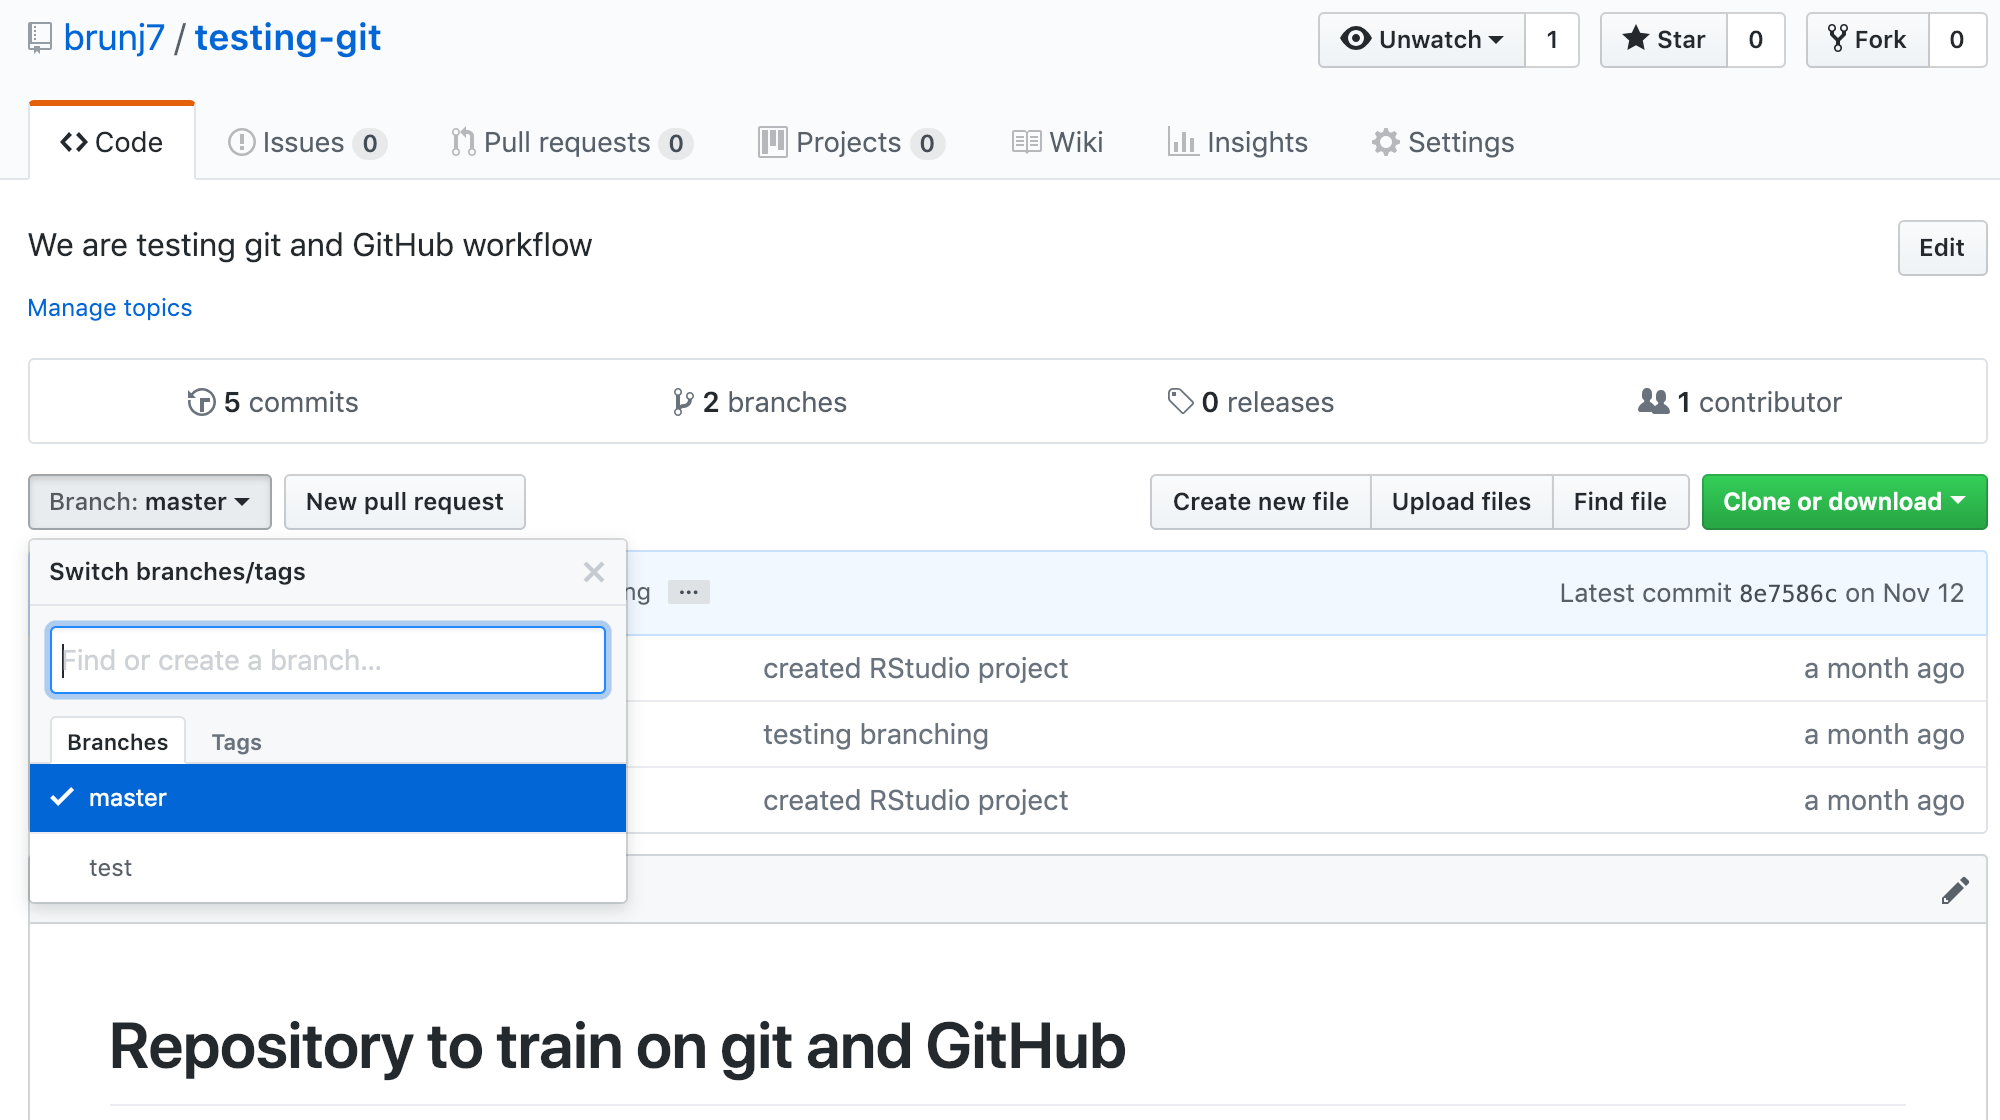
As you can see, now there are two branches on our remote repository: - master - test
7.7.2 Using a branch
Here there is nothing new. The workflow is exactly the same as we did before, excepts our commit will be created on the test branch instead of the master branch.